


Sweater mashup
My latest project, from start to (almost) finish

Here’s some sweater math for you:
1 stained sweater + 1 damaged sweater = 1 extra plush, bouncy new sweater!


I know that apparel manufacturers are under pressure to ‘make the most’ out of their materials, stretching every dollar to maximize profit. My instinct too is to make the most of my yarn, so it felt somehow wasteful and weird to combine two sweaters into one. But, when I thought about it more I realized - maybe the math kinda, sorta works out when it comes to upcycling? This idea of ‘absorbing’ larger quantities of waste in the process of creating ‘new’ products is something I want to mull on a bit more…
But before I start to ramble, I know you’re curious to see the answer to my equation -
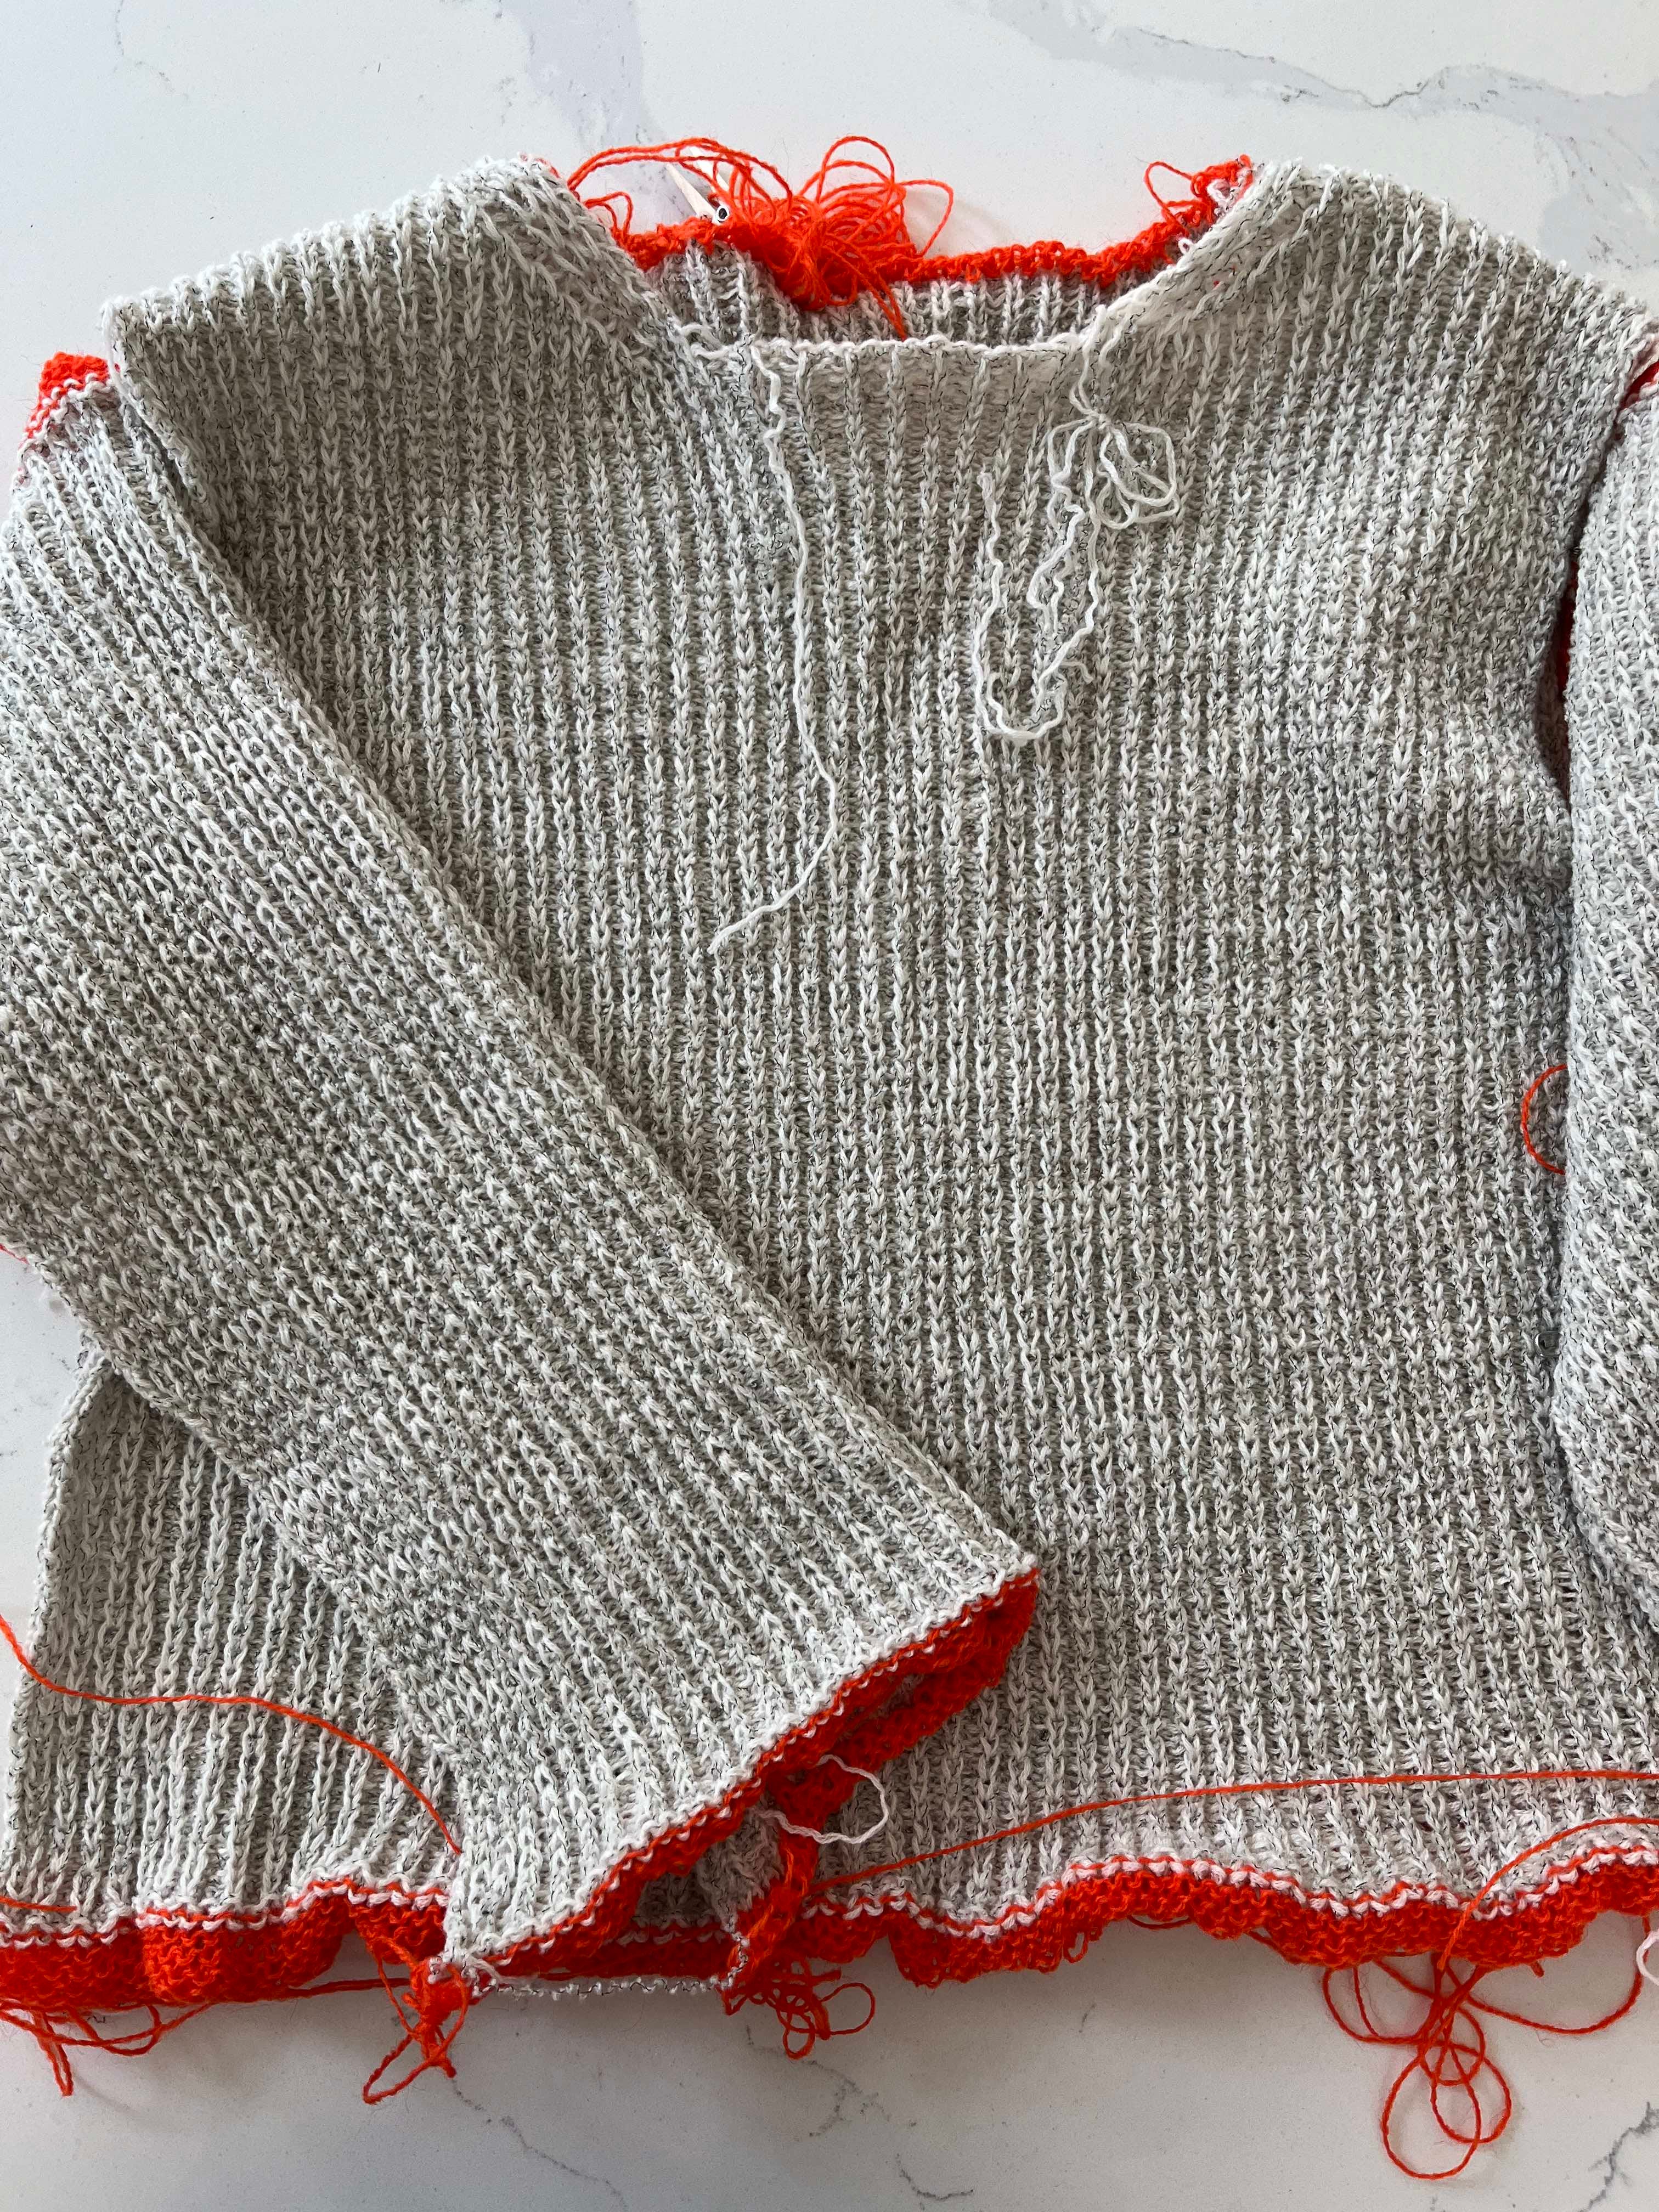
Remaining work includes attaching the sleeves, seaming the sides, and knitting the waistband, cuffs and collar.
Process notes
I decided to honor the original sweater designs and explore texture! I also wanted to get more comfortable using the ribber attachment for my knitting machine.
Years ago I bought a hand knitting pattern for a ‘fisherman’s rib’ sweater, but never got around to making it. I figured it could serve as a jumping off point for this project, and so I manually translated it for machine knitting using paper and Google Sheets.
I’m really enjoying the squishy feel of the material. I wish there was a way I could share that with you all! Best I can do is a closeup of the texture ☁️
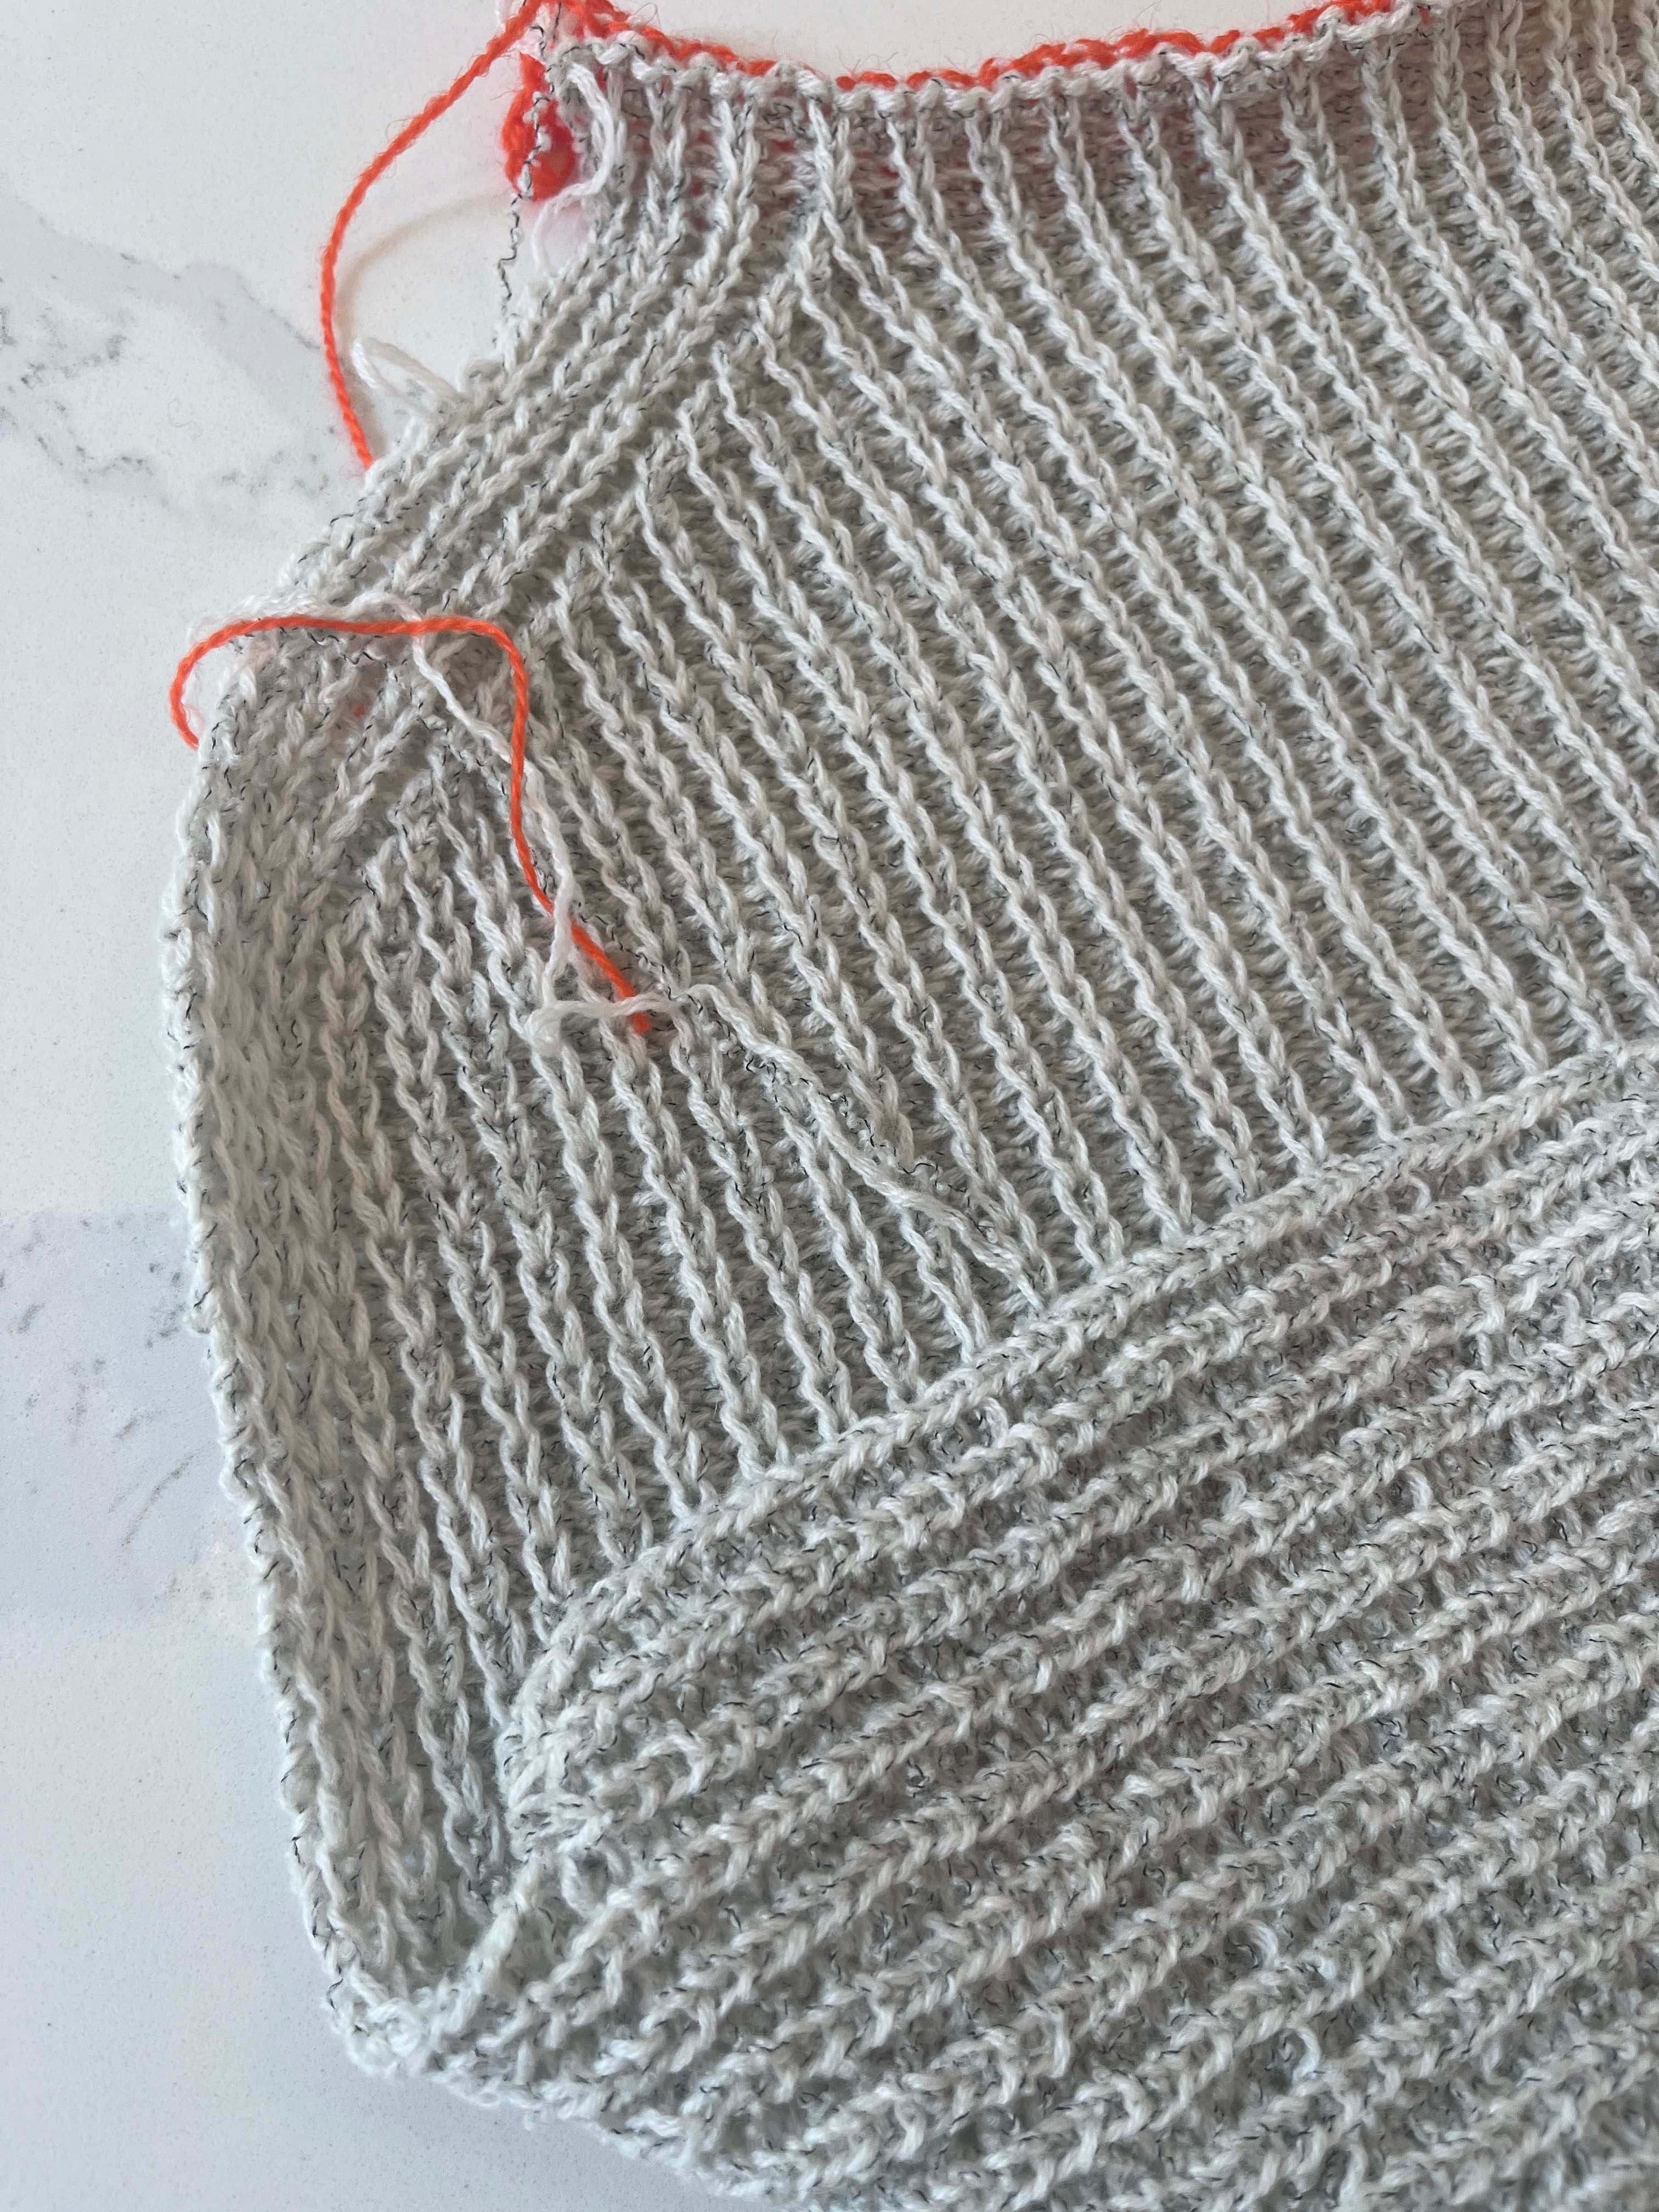
For reference, this specific ribbing style is called ‘half fishermans’s rib’. The bottom section in my photo is technically the ‘right’ side of the fabric, but I liked the look of the ‘wrong’ side better and decided to assemble the sweater inside out. The beauty of having creative control…
Challenges
Of course this project hasn’t been without it’s challenges…
Patternmaking
So much drawing! So much calculating! I know I sound like a broken record on this topic. I’m starting to develop my own system/calculator in Google Sheets, but it bugs me to feel like I’m re-inventing the wheel here.
I’m so curious to know what tools other independent designers and makers are using… and I’ve started asking around. I was recommended to check out knitwear designer and instructor Annie Lee Larson’s (very reasonably priced!) patternmaking lesson so I went ahead and bought it; I’m excited to get some insight into her process.
Cuffs & collars
Cuffs and collars are usually ribbed (I should probably do a deeper dive on ribbing & the ribber attachment for all the non-knitters out there…) because ribbing is super stretchy and can pull more easily over our hands and head. Last month I bought a ribber attachment for my knitting machine, specifically so I could make ribbed cuffs and collars.
But I keep ending up with sloppy edges that IMO look really unpolished. It’s super frustrating. In these moments I’ve had to remind myself that A) I haven’t been doing this very long and B) developing good products takes time…
Time management
Ultimately this has been my biggest challenge the last few weeks. I had the realization that I’ve never worked in a job that required large blocks of uninterrupted time. Sure, carving out a couple of hours here or there was key for writing a product spec or creating a presentation, but six hours straight with minimal interruptions? I can see why my software developer colleagues were horrified by my meeting-packed calendar.
I recently read a startup-themed Substack post that REALLY resonated with me, especially the line “product development is maddeningly slow in a world that encourages constant consumption”.

In the past couple of months I started two part-time freelance gigs in addition to working on this project, and I’m learning quickly that I need to build out some new life ‘systems’ to preserve time for product development (aka knitting)!
Ok that’s a wrap for me this week. Top of mind for me right now are -
Summer tops!
Designing & producing a small collection of one-of-a-kind pieces…!
Thanks always for reading,
Anne
I love how this turned out! I can feel how soft and squishy it is.